Today, we will take a look at three (3) CPU coolers from Cooler Master. We will see the performance comparison between the new Hyper TX3 Evo, Hyper 212 Evo and the classic V6GT. All we know that the Hyper 212+ was an excellent cooler for price/performance for a few years, today we will see if the Hyper 212 Evo can keep that line and be the new one price/performance cooler of the market.
All we know to Cooler Master not only for his coolers, we also know than this company made very good cases for rigs as the HAF 932 and big giant HAF X as well as many fan options with and without LEDs on it. Let see what Cooler Master did in the cooler segment with this two new models. For this review we mark these coolers as follow:
- CM Hyper TX3 Evo
- CM Hyper 212 Evo
- CM V6GT
Features and Specifications
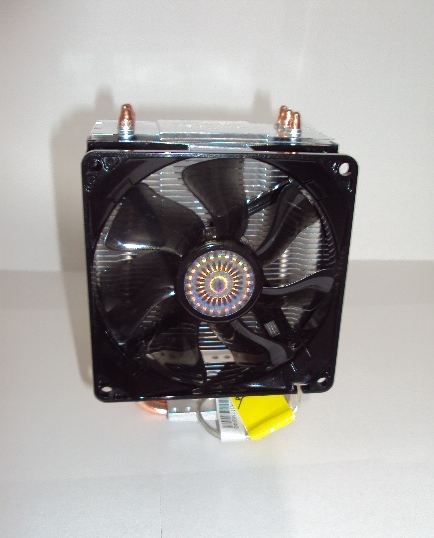
1. CM Hyper TX3 Evo
- 3 directs contact heat pipes and a base surface engineered to minimize CPU contact gaps.
- Easily add and optional second fan with quick snap fan brackets to provide cooling performance.
- Silent 92mm wide range PWM fan operating at only 17dBA on minimum speed.
|
Cooler Master Hyper TX3 Evo Specifications |
|
| Heat sink Dimensions (without fans) | 90 x 51 x 136 mm / 3.5 x 2.0 x 5.4 inch |
| Heat Pipe Dimensions | 6 mm |
| Material | 3 Direct contact heat pipes / Aluminum fins |
| Fan | 92 x 92 x 25 mm / 3.6 x 3.6 x 1 inch |
| Bearing | Long life sleeve bearing |
| Fan speed | 800 – 2800 RPM (PWM) |
| Noise Level | 17 – 35 dBA |
| Current and voltage | 0.24A / 12V |
| Heat Sink weight | 306g / 0.68lb |
| Fan weight | 73g / 0.16lb |
| Product weight | 400g / 0.85lb |
2. CM Hyper 212 Evo
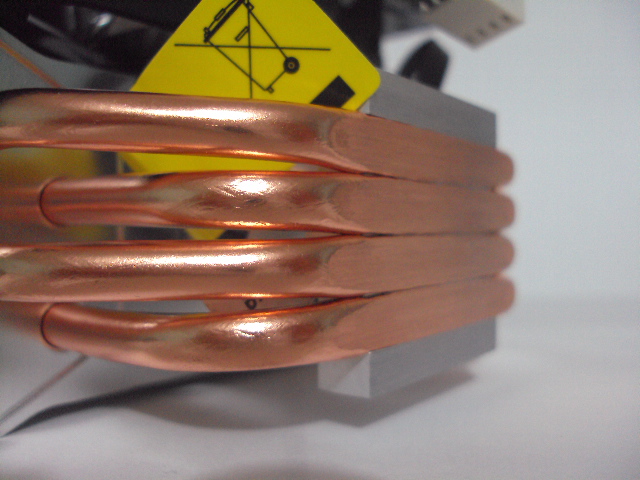
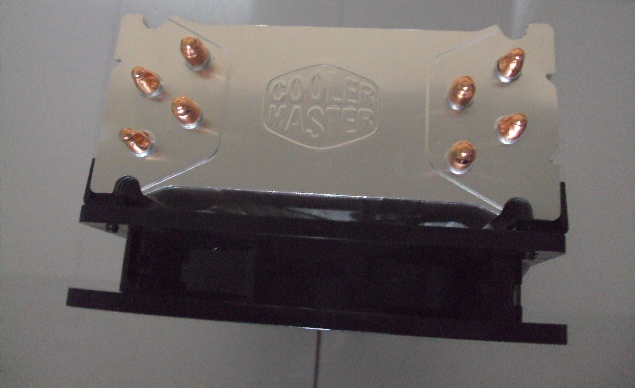
- Direct Contact heat pipes with the patented CDC (Continuous Direct Contact) technology – creating a perfect, sleek surface for heat conduction. CDC is trade mark of Cooler Master.
- Wide-range PWM fan with unique wave-shaped blade design for excellent airflow.
- Versatile all-in-one mounting solution supporting the latest Intel® LGA 1366 / 1155 and AMD FM1 / AM3+.
- Upgradable to second fan with quick snap fan bracket.
|
Cooler Master Hyper 212 Evo Specifications |
|
| Heat sink Dimensions (without fans) | 116 x 51 x 159 mm / 4.6 x 2.0 x 6.3 inch |
| Heat Pipe Dimensions | 6 mm |
| Material | 4 Direct contact heat pipes / Aluminum fins |
| Fan | 120 x 120 x 25 mm / 4.7 x 4.7 x 1 inch |
| Bearing | Long life sleeve bearing |
| Fan speed | 600 – 2000 RPM (PWM) |
| Noise Level | 9 – 36 dBA |
| Current and voltage | 0.22A / 12V |
| Heat Sink weight | 465g / 1.03lb |
| Fan weight | 104g / 0.23lb |
| Product weight | 569g / 1.26lb |
3. CM V6GT
- Highly dense and tilted aluminum fins precisely engineered for impeccable cooling performance.
- Pioneering “Doble V” heatpipe deployment compresses airflow to increase efficiency under mid to high air pressures.
- Innovative “Tool free” fan boxes for easy installation of fans.
- Accelerating twi high speed PWM fans deliver invincible cooling capability.
- Engine oil cap controls the LED strip with color changing function.
|
Cooler Master V6GT Specifications |
|
| Heat sink Dimensions (without fans) | 131 x 120 x 165 mm / 5.2 x 4.7 x 6.5 inch |
| Heat Pipe Dimensions | 6 mm |
| Material | Copper base / 55 x 0.3 mm Aluminum fins / 6 heatpies |
| Fan | 120 x 120 x 25 mm / 4.7 x 4.7 x 1 inch |
| Bearing | DybaLooop bearing |
| Fan speed | 800 – 2200 RPM (PWM) |
| Noise Level | 15 – 38 dBA |
| Current and voltage | 0.45A / 12V |
| Heat Sink weight | 939g |
| Fan weight | 104g |
| Product weight | 1043g |
All the three coolers in this review support the latest socket available in the market, even; the Hyper 212 Evo arrived with the retention bracket set for socket LGA 2011. Good move of Cooler Master here. We also see here how Cooler Master now ships the coolers with fans of the SickleFlow line, leaving back the BladeMaster that arrived with the TX3 and Hyper 212+.
Packaging and components
1. CM Hyper TX3 Evo.
This cooler comes with all the necessary components for install it in your rig, doesn’t need remove the motherboard for installation since it’s not need a back plate and is just “push” installation. Let see some pictures of this model.
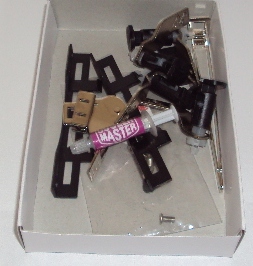
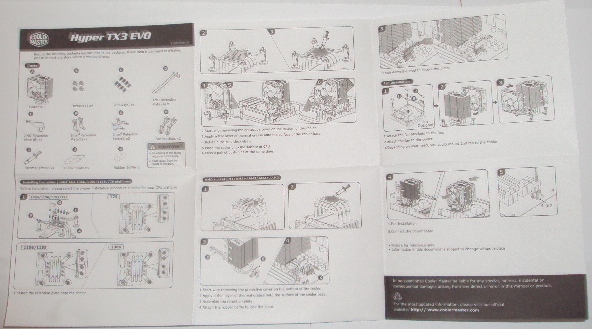
The instructions are very basic but enough for install the cooler in the proper way and with less time possible. You don’t need remove the motherboard, so, this can be a plus for people that only want better temps compared with the stock cooler but don’t want the “problem” of remove the motherboard.
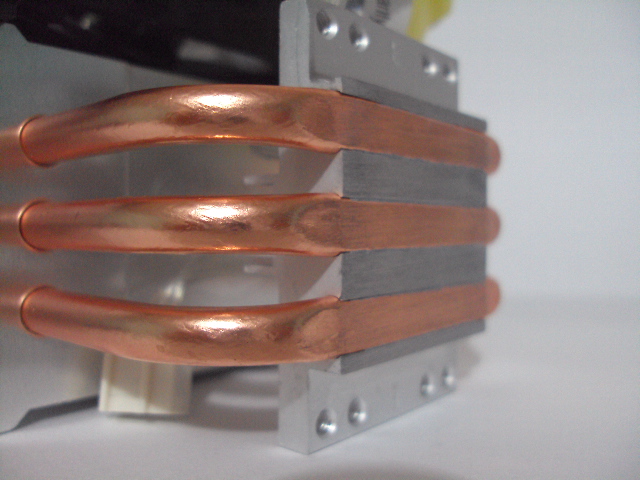
The installation is very easy, just take two or three minutes including remove the stock cooler and apply the new TIM. As you can see in the picture, the cooler isn’t big and we have enough space for install RAM with high profile in all RAM lines of our motherboard. The cooler comes without TIM pre-applied, so, we have to apply that to the CPU and fill the gaps in the cooler for better performance and heat transfer.
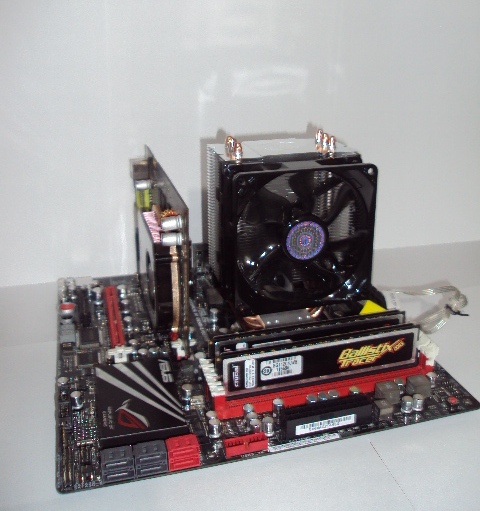
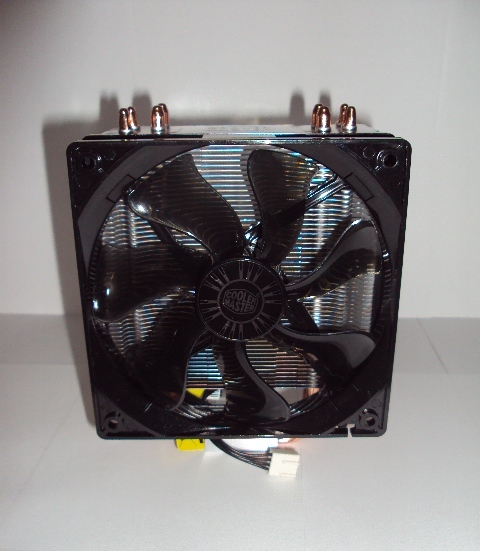
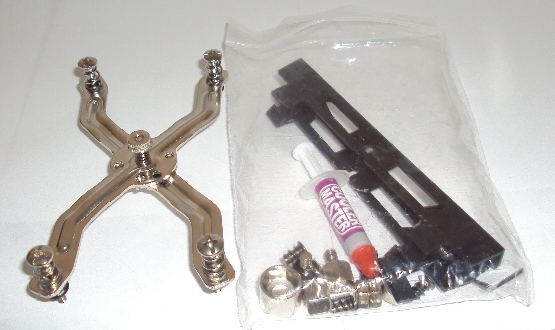
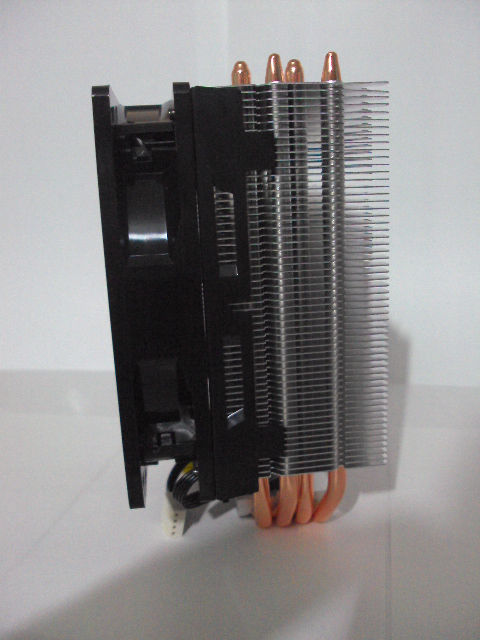
2. CM Hyper 212 Evo.
Similar to the TX3 Evo, this cooler comes with a quick installation guide that’s enough for install you new air cooler solution in our rig. Keep in mind that this model needs a back plate, so, you will need remove the motherboard at least that your case have access to the back side of it in the left panel. Here are some pictures.
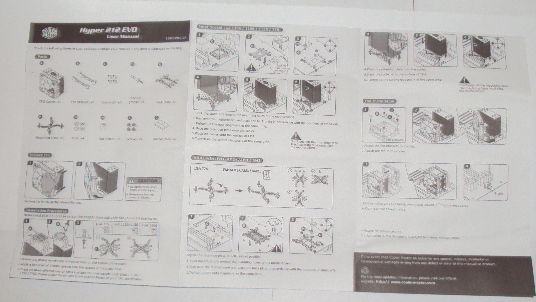
As we said before, this cooler need a little more of work for install. Comes with back plate and if your case doesn’t have access panel to the back side of the mobo you will spend a little more time install this product. The installation on our test rig took me around two minutes, but that probably was because few years ago I had the Hyper 212+ that uses the same installation method.
3. CM V6GT
We can say that this is the big and bad boy of the “budget” coolers, comes with two fans in push/pull configuration and six heat pipes for heat dissipation as fast as possible. This cooler also include a “custom” LED on the top with different color options and the possibility of have it disable for those that doesn’t like this type of “adds”. Let see some picture before start with the results.
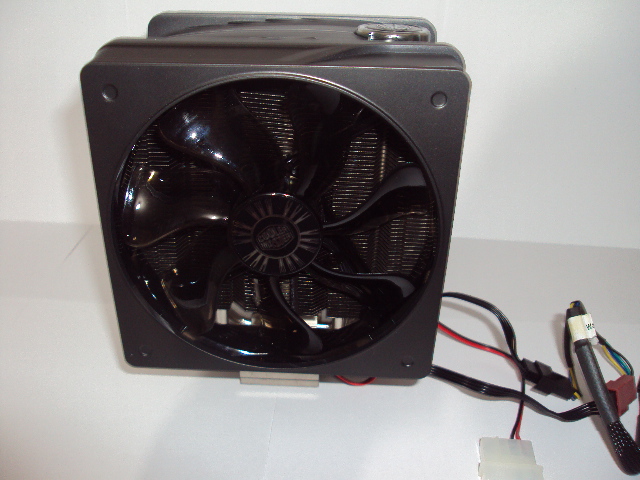
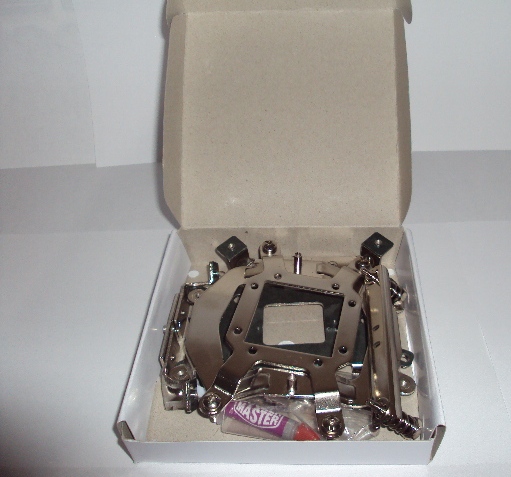
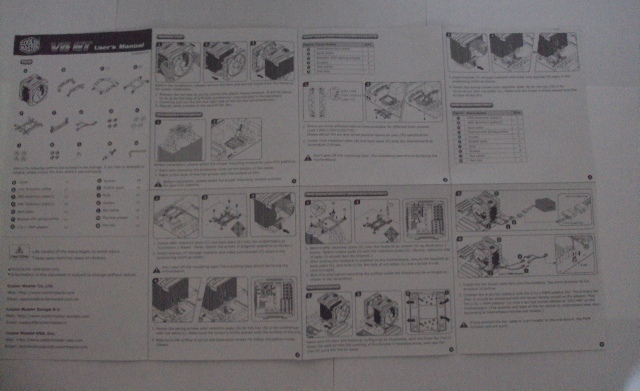
All the included with the package (big package) but enough for install and use in any platform that we can build today. Quick installation guide as the TX3 Evo and Hyper 212 Evo, but the installation process isn’t as fast as the guide is.

The contact surface with the CPU is build on copper and totally uniform for maximum heat transfer from the CPU to the cooler.
Test setup
We will test the three cooler with the same platform components, we tested this coolers at similar time of the day for try to keep the conditions very similar to all and get better results at the end. The rig is configured as follow:
- Motherboard: ASUS Maximus IV Gene-z/GEN3
- Processor: Intel Core i5-2500k, overclocked to 4500MHz @ 1.4V
- RAM: Crucial Ballistix Tracer 2 x 2GB @ 1333MHz
- GPU: XFX 8600 GT 256MB
- Power Supply: Corsair AX1200W
- SSD: Crucial C300 64GB
- OS: Windows Professional x64 Service Pack 1
- MSI R7970 Lightning (for space test not bench)
- Corsair Vengeance 2x4GB (for space test not bench)
All tests were done outside of a case and at similar hours in night trying to get the most similar conditions to all coolers. We also used an MSI T7970 Lightning for see the space between the GPU and cooler; also, we used low profile and high profile RAM to see which better option is.
Test methodology
Our test method was simple but always focused on get the better results according to what we need of the product, in this case, air coolers. All the power saving options in BIOS was disable as well as the “OS Power Options” for avoid wrong reads on our study. We used the following programs to stress the rig and see the performance of it:
- wPrime 32M
- wPrime 1024M (test 1)
- PCMark 05
- PCMark 7
- wPrime 1024M (test 2)
- prime95 for 15 minutes using “In place large FFTs”
We started with the rig on idle for 5 minutes, after that, used our 1st program for stress our CPU and see what can do our cooler in load. After each test we waited 2 minutes to stabilize the temps on our CPU and start with the next program. The Hyper 212 Evo was tested with single fan configuration and in dual fan mode always looking for gives you the best results and advice possible. We run 2 wPrime 1024M for maximum stress after finish those PCMark programs and finally prime95 “In place large FFTs” for maximum heat and power use on our rig.
Each cooler was tested two times, for make us sure that reading is average and we are seeing the correct temps on our program. The chosen program for read the temps was Core Temp 1.0 RC3 x64
The results
We test each cooler individually under very similar conditions, non case, but similar time and same components for all the three coolers. Each cooler was tested two times for avoid wrong data on temps, we don’t tested the stock cooler since was not enough for keep our CPU cool enough.

1. CM Hyper TX3 Evo
For a budget cooler that doesn’t need back plate and is very easy to install we are seeing good average temps, idle temp is very similar to the other coolers with only a 2ºc difference. In load using prime95 we saw temps above 70ºC that is a little “high” compared with the other contenders but good enough if we keep in mind that maybe you never stress the CPU as prime95 does.
RAM high profile isn’t a problem here; you have enough space to install any kit high profile as the Corsair Vengeance or Kingston HyperX. Keep in mind that we used a mATX motherboard, an ATX model can have a little more space.
2. CM Hyper 212 Evo
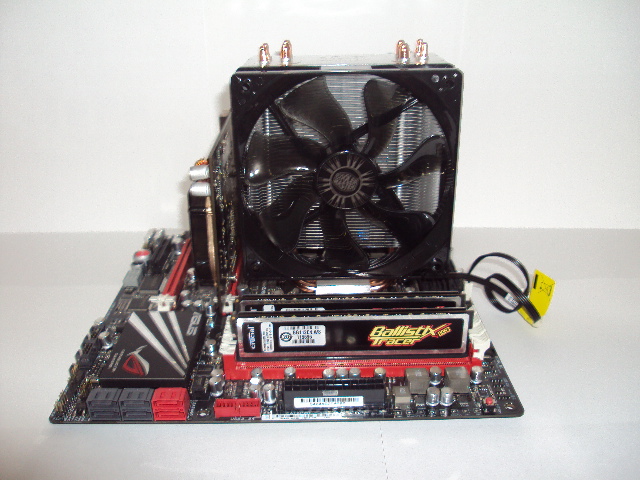
The successor of the famous Hyper 212+ is showing us that Cooler Master still want be on the list of manufactures of excellent products. The temps on idle aren’t something amazing, the average looks more better and the max temp on load was always under 70ºC, even, never touched the 66ºC on our overclocked CPU. Good work of Cooler Master here.
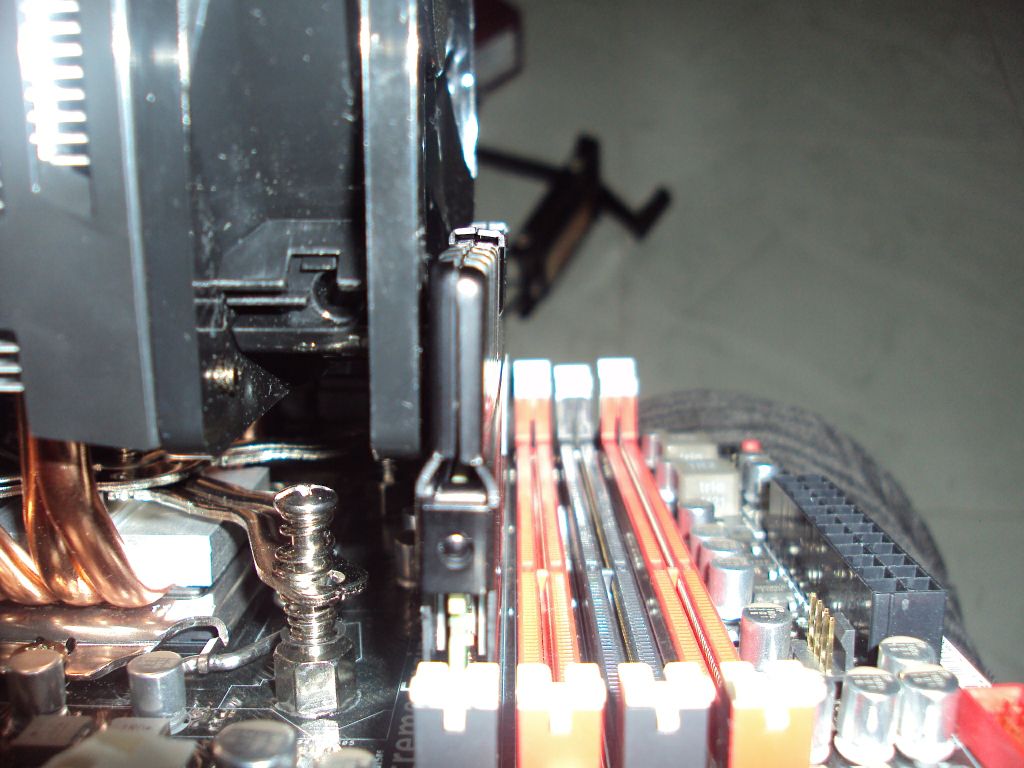
RAM clearance can be a problem here, we were able to install a Corsair Vengeance kit but in the “adjustment” way as we can see in the picture. Keep in mind that we used a mATX motherboard, an ATX model can have a little more space for use that kind of RAM.
3. CM Hyper 212 Evo Push/Pull
We got weird temps here, same temp on idle that our single fan configuration and same average temp. The only change that we saw here was the max temp on load, with only a 2ºC change keeping the CPU under 63ºC in prim95. We have encountered feelings here, we was waiting a little more on this configuration than we saw here. Could be a wrong installation of the 2nd fan? We prefer thought that.
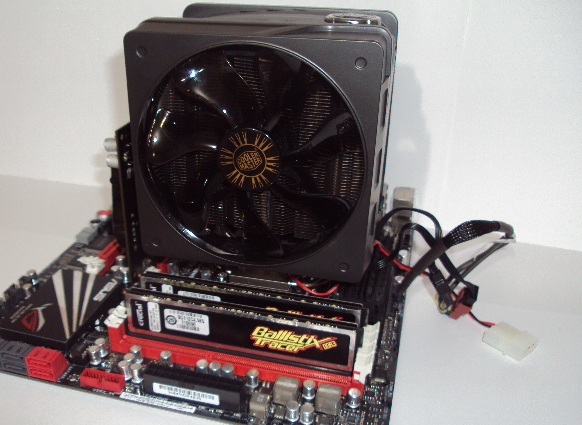
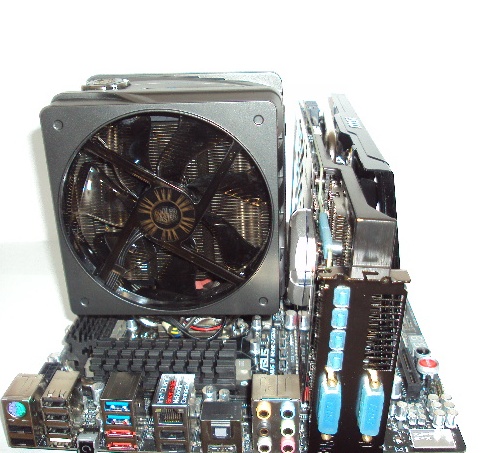
4. CM V6GT
As we saw in the above pictures, this cooler is big and comes from manufacturer in dual fan configuration mode. The temps on idle didn’t changed while our average temps was better for around 5ºC, finally our max temp was under 60ºC, more exactly on 59ºC. We have to say that we was waiting more from this cooler, the average temps seems good enough but for a cooler that comes from manufacturer in dual fan configuration and is a full copper base in direct contact with the CPU and without gaps, isn’t enough.
If you have high profile RAM, move on to another option, this cooler is big and won’t give you the option to use that kind of RAM with it. We only can use high profile RAM in channel B and second line of channel A. 1st RAM slot isn’t accessible with this cooler on this mobo. Keep in mind that we used a mATX motherboard; an ATX model can have a little more space. Big GPUs are also a problem.
Conclusion
First that all, we would like thank to Cooler Master for provide us this samples for review. This three coolers did a good work, one better than others, but in average all the three are good options depending of your budget.
1. CM Hyper TX3 Evo
This “entry” option from Cooler Master can be found on Google Shopping for around $43.71, a high price compared with the other two options. Doing the price to one side, the cooler is a good option for those users that just want better temps on their CPU and doesn’t have plans of overclock it at the same level that we did here. The 90mm fan is rated at 2800 rpm max, but it’s not totally loud at max speed, the 3 direct heat pipes does a good job keeping the CPU under dangerous temps but we thing that this cooler can do a little more.
The installation method is the most notable feature here, could be a “plug and play”.
2. CM Hyper 212 Evo and CM Hyper 212 Evo P/P
This new model, with the contact surface re-designed for provide better performance keep the line of his predecessor the Hyper 212+. With single fan configuration this cooler is a very good option for those users that want overclock their CPU at a good level but at the same time keep the temps in the safe area. In dual fan configuration (P/P) the performance was not as good as we thought, in fact, we saw some temps more high that in single configuration.
The Hyper 212 Evo can be found for ~$39 on newegg, that’s much better price than the TX3 Evo. After test the cooler in single and dual fan, we only can recommend this cooler in single fan configuration since adding $7 more for a 2nd fan is extend the budget to ~$46, in that budget, we can find other options which performs better.
The installation method is still difficult, for new users this can take more time that really need. We also suggest work a little more in the gaps of the contact surface, we still can see those gaps and that definitely affect the performance of the cooler.
3. CM V6GT
About this cooler we have not much to say, for a cooler of this size and configuration (dual 120mm fan) the performance isn’t enough. The average temps are above our ambient temp (~18ºC) for almost 20ºC while the Hyper 212 Evo keep this at 25ºC with single fan configuration. The LED looks good, but doesn’t help in any way too cool the CPU, so, that’s just an “add” for the users.
This cooler can be found for ~$49 on newegg, for this price we move on to another options with similar prices and better performance.
The installation method was similar to the Hyper 212 Evo, but without too much “nuts and bolts”. Not the best installation method, but more easy than Hyper 212 Evo.
Awards:
- TX3 Evo: “Approved”. This renewed model is a little expensive compared with the Hyper 212 Evo but performs very good if you only want get better temps than stock cooler and not use too much space inside your case while keep the easy installation.

- Hyper 212 Evo: “Recommended”. This new model performs very good and keep the line of the Hyper 212+ for price/performance, adding a better (but not perfect) contact surface to the cooler.

- V6GT: We was waiting more from this model, for a big dual fan setup cooler the performance wasn’t enough compared with the new Hyper 212 Evo. Even that, we can give to this model an “Approved” award since can keep good temps on your CPU while add a good look inside your case with the custom LED colors.
August 27, 2012 8:27 am
Haha lol. The tx3 is more expensive, don’t think so. Never was, never will be.
November 24, 2012 12:39 pm
IMHO the article is pretty useless unless it shows how much improvement do we get over the stock cooler.
May 10, 2013 4:14 am
@disqus_LEiaFYG3GO:disqus
Well like they said the stock cooler will reach over 80ºC and shutdown the MOBO, so it’s useless to add it since you would not get a full test, anyways the TX3 is WAY better than the intel stock one, if it wasn’t for the overheat protection an intel stock fan would kill any i5 at 4.5GHz like the one used in this test, reaching over 90ºC.